When you dive into the vast world of All The Mods 10 (ATM 10), the vanilla mob grinder quickly feels, well, a little vanilla. While effective for basic drops, it leaves much to be desired when you're chasing the unique resources, complex systems, and sheer efficiency that mods offer. This guide isn't about the same old dark room spawner; we're exploring Alternative XP Farms in ATM 10, leveraging innovative modded mechanics to not only drown you in experience but also provide a steady stream of highly coveted, unique drops. Get ready to elevate your farming game far beyond basic cobblestone and water streams.
At a Glance: Your Toolkit for ATM 10's Best XP Farms
- Apotheosis Spawners are Kings: Customizable, portable, and incredibly powerful, they form the backbone of many advanced farms.
- "Player Kill" is Key: For special drops like L2 Trait Symbols, your automated killer must register as a player kill. Modular Golems, Ars Nouveau Runes, and Mahou Tsukai are your best bets.
- Modded Mob Movement: Ditch plain water. Ars Nouveau's Warp Portals, Create's Fans, or Primal Magick's Turbines offer precise, high-volume mob relocation.
- Loot Filtering is Non-Negotiable: With the sheer volume of drops, Sophisticated Storage, Theurgy, and AE2 are essential for sorting the treasures from the trash.
- L2 Difficulty Management: Understand when to embrace L2 hostility for rare drops and when to suppress it with a Hostility Orb to prevent lag and overpowered mobs.
- Beyond Mobs: Explore Drygmy farms, Productive Bees, and Mystical Agriculture for passive, unique resource generation without traditional mob slaughter.
The Unseen Hand: Understanding Mob Spawning in ATM 10
Before we unleash modded mayhem, a quick refresher on the fundamental rules governing mob behavior. These bedrock principles, largely unchanged from vanilla Minecraft, dictate where and when creatures appear, ensuring your elaborate contraptions actually work:
- No Personal Space: Mobs won't spawn within a 24-block sphere of any player. This is why AFK spots are crucial for farm activation.
- Out of Sight, Out of Mind: Mobs instantly despawn if they wander more than 128 blocks from the nearest player. Plan your collection and killing zones accordingly.
- The 32-Block Sweet Spot: Mobs randomly despawn if they're more than 32 blocks away from a player, unless another player is within that 128-block despawn range. This sweet spot (24-32 blocks) from your AFK location to your spawning platforms is ideal for maximizing spawn rates.
With these rules in mind, let's explore how ATM 10's mods shatter the limitations of vanilla farming.
Beyond Basic Spawners: Generating Mobs and Resources Innovatively
While a simple dark room grinder might catch you a few zombies, ATM 10 offers a universe of sophisticated ways to conjure creatures and their precious drops.
Specialized Modded Generations: No Kill Required (Sometimes)
These methods often bypass traditional mob farming altogether, providing specific drops through unique mechanics.
- Ars Nouveau - Drygmy Farms: Imagine tiny, magical sprites doing your dirty work. Drygmy charms, placed in Drygmy Houses, passively farm contained mobs (captured with a Tablet of Containment in a Ritual Brazier and stored in a Containment Jar). These little workers gather drops over time without actually killing the mobs. It's an excellent way to get specific mob items, like those from Occultism mobs, without worrying about combat mechanics. Just feed them Source, and they'll keep busy!
- Evilcraft - Box of Eternal Closure: For the truly daunting mobs—think Withers or Twilight Forest bosses—the Box of Eternal Closure, combined with a Vengeance Spirit in a Spirit Furnace, offers a unique way to farm their drops. This system leverages the Vengeance Spirit's ability to replicate difficult mob drops, requiring a steady supply of Blood (often generated from other Evilcraft mob-killing setups).
- Mystical Agriculture - Essence Crops: Sometimes, the best way to get mob drops isn't to kill the mob at all. Mystical Agriculture lets you cultivate "essence" seeds (like Inferium, Zombie Essence, or Skeleton Essence). Plant them, grow them, harvest them, and you'll receive the drops you need, often in greater quantities and with far less infrastructure than a traditional farm. This is your go-to for scalable, passive resource generation.
- Productive Bees - Amber Harvest: Who knew bees could be so productive? Amber Bees will encase nearby mobs in harvestable amber. The real magic happens with the Wannabee addon in a Beehive: feed it the amber-encased mob block, and it will churn out the mob's drops. It's a whimsical, yet highly effective, way to get specific mob loot.
Supercharging Your Spawners: Apotheosis and Ars Nouveau
Spawners remain a cornerstone, but in ATM 10, they're far from simple.
Apotheosis Spawners: The Ultimate Customization
These are your workhorses. Found in dungeons or crafted, Apotheosis Spawners can be picked up with Silk Touch and transformed into any mob spawner using a corresponding spawn egg (obtainable via the Capturing enchantment). The true power, however, lies in their nearly endless upgrade paths:
- Speed & Quantity:
- Sugar: Reduces minimum spawn delay by 10 ticks.
- Clock: Reduces maximum spawn delay by 20 ticks.
- Fermented Spider Eye: Increases spawn count by 2.
- Ghast Tear: Increases max nearby entities by 2.
- Piston: Increases spawn range by 2 blocks.
- Conditions & Control:
- Prismarine Crystal: Extends player activation range by 4 blocks.
- Nether Star: Ignores the 'players nearby' condition (spawns even if you're too close).
- Soul Lantern: Ignores light conditions (spawns in bright light).
- Conduit: The ultimate freedom – ignores all conditions (light, space, etc.), allowing spawns anywhere.
- Comparator: Enables Redstone control, letting you toggle the spawner with a signal (perfect with Create Redstone Link or Ars Nouveau Redstone Relay).
- Special Effects:
- Echo Shard: Adds 'Echoing,' causing mobs to drop extra loot – a huge boon for resource gain!
- Campfire: Mobs spawn on fire.
- Turtle Egg: Spawns babies.
- Wool: Makes the spawner silent.
- Chorus Fruit: Crucially, spawns mobs with No AI. This is fantastic for kill chambers as mobs won't move or fight back, making collection easy. However, note that mobs with No AI will not drop L2 difficulty-specific items.
- Pointed Dripstone: Mobs spawn with -5% initial health.
Ars Nouveau Source Spawners: Elemental Power
These unique spawners draw their power from Source. Place a Containment Jar (with your desired mob) directly underneath the Source Spawner, supply Source, and watch the magic happen. They're simpler than Apotheosis spawners, lacking the deep upgrade system, but are reliable for steady, Source-powered mob generation.
Enderman Farms: A Classic, Reimagined
The vanilla Enderman farm design still shines, especially for large amounts of XP and occasional unique drops. Build it far from the main End island, use an Endermite to draw aggro, and funnel them into a kill chamber. We'll detail an L2-focused version later, crucial for specific high-tier items.
The Great Migration: Moving Mobs Efficiently
Once mobs spawn, you need to get them where you want them – usually a compact killing chamber. Forget unreliable water streams (especially in the Nether). ATM 10 offers superior solutions.
Modded Movement Methods: Precision and Power
- Ars Nouveau:
- Warp Portal blocks & Warp Scrolls: These are game-changers. Create a Warp Portal frame, configure a Warp Scroll to your killing area (Shift+Right-click on the destination), throw the scroll into the frame with Source nearby, and mobs will teleport! Stabilized Warp Scrolls even allow interdimensional travel.
- Ritual of Attraction: A Ritual Brazier with the Tablet of Attraction, powered by Source, will pull mobs and items within an 8-block radius towards it. Great for centralizing spawns.
- Glyph of Summon Decoy: Trap a decoy in a Containment Jar on a Ritual Brazier. Power it with redstone, and mobs with AI will be irresistibly drawn to it, making it perfect for funneling.
- Primal Magick:
- Zephyr Engine: Pushes mobs away from it.
- Void Turbine: Pulls mobs towards it. Combine these for powerful, directional mob movement.
- Create:
- Encased Fan: Simple yet effective. Give it rotational force, and it can push or pull mobs (and items) in a specific direction.
- Conveyor Belts: Also part of Create, these are excellent for moving non-flying mobs horizontally.
- Data and Essence (DnE):
- Laser Emitter with Acceleration Lens: Part of your Essence network, these lasers can rapidly push mobs in a straight line, creating highly efficient movement channels.
Building Your Mob Highways: Setup Examples
To make these movement methods sing, you'll want a well-designed spawn platform. An 8x8 platform (for a 7-block spawner range) is a good starting point, bordered by solid blocks, Sourcestone, Mirrorweave, or waterlogged leaves/slabs to control spawns. Elevate your spawner in the middle to prevent anything spawning below your portal or collection point.
- Ars Nouveau Warp Portal Setup: Place your spawner(s) above a portal frame. Have a Source Jar nearby. Throw your configured Warp Scroll into the frame. Mobs will fall into the portal and instantly be transported to your killing zone.
- Ars Nouveau Ritual of Attraction: Position your Ritual Brazier (with the Tablet of Attraction) slightly above your spawning platform, perhaps elevated on a pillar. This centralizes mobs for easy drop-off into a hole.
- Ars Nouveau Decoy Funnel: If you're using mobs with AI, place a Containment Jar with a trapped Decoy spell at the entry point of your killing chamber. Power it with redstone, and mobs will march right in.
- Primal Magick / Create Fan / DnE Laser: For a centralized approach, place your spawner in the center of a platform. Surround it with Zephyr Engines (pushing out) and Void Turbines (pulling in) to guide mobs towards a single corner. Create fans work similarly, using rotational force to push or pull. DnE Lasers can create strong, continuous pushes into a killing pit.
The Final Blow: Automated Killing Methods
Once you've gathered your mobs, it's time to dispatch them. Crucially, the method of killing determines whether you get special "player kill" drops (like L2 Trait Symbols) or just standard loot.
The "Player Kill" Advantage: For High-Tier Drops
These methods simulate a player killing the mob, triggering special loot and increasing L2 difficulty. If you're looking to acquire powerful Apotheosis gear or rare currency, these are your go-tos.
- Ars Nouveau - Sensitive Runes & Spell Turrets:
- Sensitive Runes: This is a top-tier option. In your killing area, place Runes (e.g., Damage, AoE, Explosion) with a Source Jar nearby. Cast a spell like
Touch -> Rune -> Sensitive -> Spark -> Discharge. Crucially, apply theSensitivemodifier. Make them permanent with Runic Chalk. When these activate, they register as a "player kill." You can boost their damage with Ars Nouveau gear/threads, potions, or by simply holding a weapon with high crit/looting while AFKing nearby. They will apply Curios and player stats (like crit chance/damage), and drop player-kill items like Grave Dust. - Spell Turrets: These can be configured with powerful damage spells. If configured to mimic player actions (e.g., using a spell that applies
Sensitive), they can also achieve player kills. - Modular Golems: Equip a custom Golem with powerful combat weapons (Unobtainium Scythes with max enchantments, affixes, and gems are excellent). Place them in your killing area. Golems, especially those with Eternium Humanoid Body/Legs for immunity, function as players. They increase L2 difficulty, apply Curios/player stats, and drop player-kill items. This works exceptionally well with mobs spawned with the Apotheosis 'No AI' (Chorus Fruit) upgrade.
- Mahou Tsukai - Boundary of Drain Life: This powerful scroll creates an AoE zone that slowly damages mobs and accumulates Mahou. Importantly, it registers as a player kill, allowing for L2 drops and difficulty scaling.
Standard Kills: For General Loot and XP
These methods are efficient for basic drops, XP, and other mod-specific resources, but won't trigger player-kill bonuses.
- Reliquary Pedestals: Place a Pedestal (powered by redstone) with a sweeping edge weapon (maxed enchantments/affixes/gems). It will attack mobs within range. However, Reliquary Pedestals are NOT considered player kills. They won't increase L2 difficulty, apply Curios, or drop player-kill specific items. Don't use them for L2 farming.
- Data & Essence (DnE) - Essence Leech & Harming Lasers:
- Essence Leech: This block (affecting a 3x3x3 area above it) slowly kills mobs and generates Essence.
- Laser Emitter with Harming Lens: Connected to your Essence network, these can quickly dispatch mobs.
- Neither DnE method registers as a player kill. They are excellent for passively generating Essence and standard loot, but won't get you L2 Trait Symbols.
- Evilcraft - Spikes: Simple and effective. Mobs falling onto Spikes will be killed, and blood will be collected (useful for other Evilcraft processes). Spikes are NOT player kills.
The Haul: Loot Considerations & Extra Resources
Beyond basic items, ATM 10's alternative farms generate a wealth of valuable resources.
- L2 Hostility Drops: These are the big prize if you're leaning into Apotheosis's difficulty system. Cursed Droplets and Trait Symbols drop from L2 mobs. They absolutely require a "player kill" method and, often, a player to be within specific proximity to trigger L2 difficulty scaling.
- Apotheosis Drops: Spawners, especially in higher world tiers, can yield equipment with powerful affixes and rare Affix Gems. A well-tuned Apotheosis spawner farm is an endgame gear factory.
- Evilcraft Blood: Essential for many Evilcraft processes, generated by killing mobs near Evilcraft blocks.
- Ars Nouveau Source: A Vitalic Sourcelink near your killing area converts mob deaths into this precious magical energy.
- Data and Essence Essence: The Essence Leech block specifically generates this resource, vital for DnE machines.
- Mahou Tsukai Mahou: Accumulates when using Boundary of Drain Life.
- Experience (XP): All mob deaths generate XP orbs. Coupled with sophisticated collection, this can be an endless source of levels.
- Reliquary Charm Fragments: Occasional drops from killed mobs, useful for crafting Reliquary items.
- Occultism Mobs: Easily farmable in spawners or with Drygmys, these provide unique drops for Occultism rituals. Wild Breeze rituals can spawn multiple types; if using No AI spawners, check if it applies to all. Drygmy farms simplify this.
The Smart Collector: Collection and Filtering Methods
A powerful farm is useless without efficient collection and intelligent filtering. In ATM 10, manual item sorting is a thing of the past.
Ground Item Collection: The Vacuum Effect
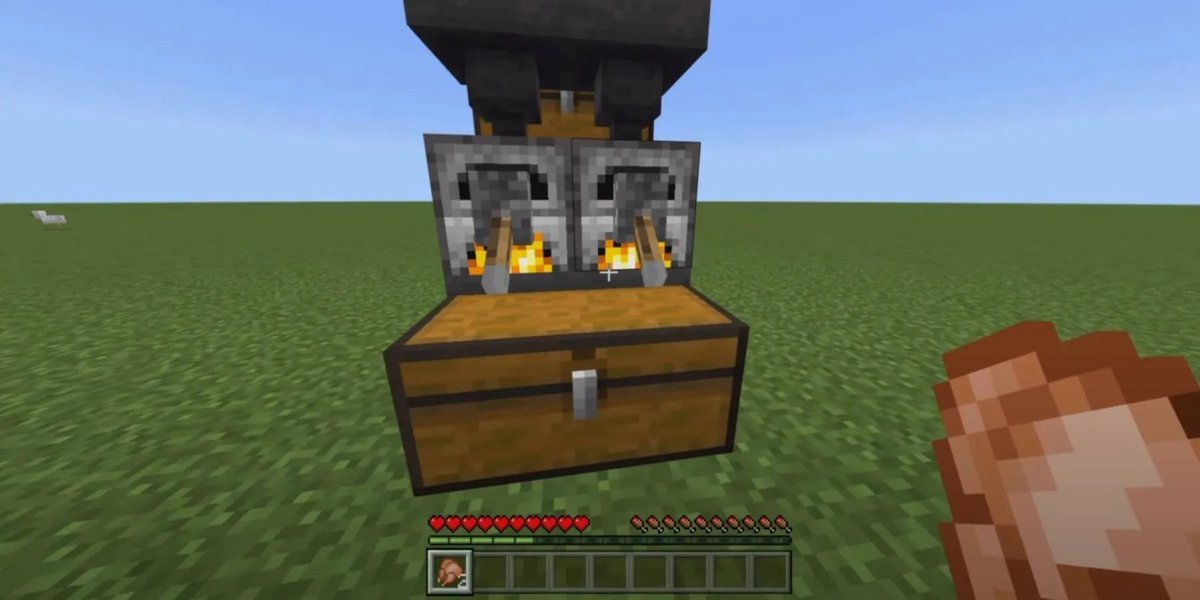
- Sophisticated Storage: Your best friend. Backpacks, chests, and barrels with Magnet Upgrades (pulls items), Advanced Magnet Upgrades (wider range, powered), Stack Upgrades (capacity), and Tank Upgrade + Experience Pump Upgrade (for XP storage) are indispensable.
- Create: Conveyor Belts for horizontal movement, Chutes for vertical drops, and Encased Fans for blowing items into collection points.
- Occultism: The Foliot Item Collector is a spirit job that will diligently gather items for you.
- Ars Nouveau:
- Starbuncles: Loyal little critters that can be configured to pick up specific items and deposit them into linked inventories.
- Spell Turrets/Runes with Pickup effect: Can collect items in an AoE and deposit them into adjacent containers.
- Ritual of Attraction: Attracts items (and mobs) within an 8-block radius.
- Containment Jar with Allay: An Allay trapped in a Containment Jar acts as a vacuum hopper, pulling items and depositing them into an adjacent inventory every 40 ticks.
- Data and Essence: The Vacuum block (connected to a container) has a 10-block pull range and collects items in a 3x3x3 area directly into its attached inventory.
Item Transport: Getting Goods Where They Belong
- Data and Essence: Item Nodes are a versatile and often overlooked transport system.
- Theurgy: Mercurial Item Inserter/Extractor paired with Mercurial Copper Wire provides powerful, filtered item movement.
- Ars Nouveau: Starbuncles are great for filtered local transport. Spell Turrets with a Toss effect can launch items.
- Create: Beyond belts and chutes, Mechanical Arms can pick up and place items, and Item Vaults act as large, connectable storage.
- Ender Chests (Vanilla): Still excellent for long-distance, interdimensional transport and buffering.
Filtering & Sorting: Precision Management
- Sophisticated Storage: Filter Upgrade (basic item filtering), Advanced Filter Upgrade (complex logic, NBT, tags), and Void Upgrade (destroys unwanted items or overfills).
- Create: Andesite/Brass Funnels (simple item filters), Attribute Filter (NBT/tag-based filtering), and List Filter (multiple item definitions).
- Theurgy: Mercurial List Filter and Mercurial Attribute Filter integrate seamlessly with their inserters/extractors for highly specific filtering.
- Ars Nouveau: Starbuncles can be assigned filtered pick-up and deposit rules.
Storage Solutions: Your Digital Vaults
- Sophisticated Storage: The upgradable Chests, Barrels, and Backpacks are excellent for local, high-capacity storage, especially with voiding and filtering.
- AE2 (Applied Energistics 2): For true mass digital storage, an AE2 system with ME Drives, Storage Cells, and access terminals is the endgame. It's how you'll manage the enormous influx of items from large-scale farms.
Putting It All Together: Advanced Farm Builds
Let's look at some detailed examples that combine these mechanics for powerful results.
Apotheosis Affix Item Filtering: The Ultimate Gear Factory
This setup focuses on processing the flood of Apotheosis-affixed gear from a high-tier spawner farm, salvaging the trash, and passing the valuable gems and materials to your main storage.
- Mob Farm Core: Start with a robust mob farm (e.g., Apotheosis spawners with all the bells and whistles: high spawn rate, Echoing, No AI, Ignore Players/Light/Conditions). Use Ars Nouveau portals or Primal Magick turbines for efficient mob movement and
SensitiveRunes or Modular Golems for "player kills." - Initial Collection & Voiding: Under your killing area, place a Sophisticated Storage Netherite Double Chest. Equip it with a Magnet Upgrade (to pull all drops) and a Void Upgrade configured to destroy common, worthless items (like plain dirt, rotten flesh if not needed, etc.). For XP, have Netherite Backpacks (filtered not to pick up items, just XP) with Advanced Magnet, Stack, Tank, and Experience Pump Upgrades in your AFK spot.
- Item Transport: Use Data and Essence Item Nodes with Universal Sigil Upgrade: Speed to pull items rapidly from the collection chest.
- Intermediate Buffering: Direct these items into a series of Sophisticated Storage chests connected by a Storage Controller. This provides buffer and a central point for further processing.
- Filtering for Main Network (AE2):
- From the output of your Sophisticated Storage buffer, place a Theurgy Item Extractor. Connect it via Mercurial Copper Wire to a Theurgy Item Inserter feeding into an AE2 ME Interface.
- Crucially, apply a Mercurial Attribute Filter to the Extractor. Configure it with tags
#c:toolsand#c:armors, and set the filter to Deny-List. This means anything not a tool or armor (e.g., mob drops, gems, salvage materials) will pass through to your AE2 system.
- Salvaging Line Setup:
- The Sophisticated Storage buffer chest should now contain only tools and armor (or what the previous filter didn't deny).
- Set up another Theurgy Extractor/Inserter pair. This Extractor should have a Mercurial Attribute Filter (tags
#c:toolsand#c:armors) set to Allow-List (Any). This ensures only tools/armor go to the next step. - Direct these items into the first Sophisticated Storage Netherite Barrel of a salvaging line.
- Surround these barrels with Apotheosis Salvaging Tables.
- Configure each barrel with an Advanced Hopper Upgrade set to Pull/Push to sides. This setup will:
- Push affixed items to the adjacent Salvaging Tables.
- Receive the salvaged materials back from the tables.
- Push any unsalvageable items or excess salvage materials to the next barrel in the line.
- The final barrel in the line acts as your output. Add an Advanced Void Upgrade (in Block Mode) to store specific, valuable salvage materials (e.g., Gem Dust, Salvaged Materials) while voiding any common, useless salvage. Finally, link this barrel to your main storage or AE2 network for the valuable components.
Enderman Farm for L2 Trait Symbols: The Endgame Grind
When you're chasing the most powerful enchantments and gear, L2 Trait Symbols are a must. This Enderman farm design focuses on high-efficiency, player-kill L2 drops.
- Remote Location: Build your farm >128 blocks away from the main End island. This isolates your mob cap and prevents interference.
- Spawning Platform: A massive platform at Y=1 in the End (using End Stone or any valid spawn block) will be your spawning grounds.
- Controlled Border: Surround your platform with Sourcestone and place waterlogged Leaves on top. This prevents Endermen from spawning or teleporting onto the edges.
- AFK Sweet Spot: Position your AFK spot >32 blocks from the spawning platform, but crucially, <128 blocks from your killing zone. This maintains mob despawn rules while allowing L2 difficulty to ramp up.
- Killing Zone: Design a compact 2x2 or 3x3 killing area. A low ceiling (e.g., 6 blocks high) helps contain Endermen. This is where your player-kill magic happens.
- Automated Killing: Use Ars Nouveau Runes (Sensitive) in the killing area. Configure them as described above (
Touch -> Rune -> Sensitive -> Spark -> Discharge, made permanent). These will register as player kills, essential for L2 drops. Consider holding a high-looting, high-crit weapon while AFK to further boost drops and damage.
- Collection & Transport: Use Sophisticated Storage containers with Magnet Upgrades under the killing zone. Transport the collected items back to the Overworld using colored Ender Chests.
- AFK Protection: The End is dangerous. Secure your 1x2 AFK waiting area with at least 3 layers of Obsidian, topped with waterlogged Leaves to prevent any teleports or attacks.
Pro Tips & Pitfalls to Avoid!
Even with the best designs, small details can make or break your farm.
- Evilcraft Vengeance Spirits: These powerful mobs can spawn when other mobs die if certain Evilcraft conditions are met. Place Gemstone Torches strategically around your killing area to prevent their unwanted appearance.
- L2 Difficulty Management: The Hostility Orb vs. Loot Paradox
- Disabling L2 Difficulty: If your goal is not farming L2 Trait Symbols or other difficulty-scaled drops (perhaps you just want XP and normal loot, or want to reduce server strain), place a Hostility Orb (L2 Hostility) near your spawners. Configure it to set the chunk difficulty to 0. This prevents mob strength from increasing and significantly reduces lag from overpowered mobs.
- Farming L2 Drops: If you are actively pursuing Cursed Droplets and Trait Symbols, you cannot use the Hostility Orb to suppress difficulty. Furthermore, enabling the Apotheosis spawner upgrade 'No AI' (Chorus Fruit) will disable L2 drops, as mobs without AI don't count for the difficulty calculation. For L2 farming, mobs need their AI, and your killing method must be a "player kill."
Mastering ATM 10 XP farms is less about grinding and more about ingenious automation. By understanding these modded mechanics and integrating them wisely, you can build systems that provide not just unparalleled experience, but also a limitless supply of the rarest resources the pack has to offer. This journey into advanced farming will transform your gameplay, turning tedious tasks into elegant, automated triumphs. For more insights on maximizing your progression, make sure to check out our comprehensive guide to mastering ATM 10 XP farming across all stages of the game.